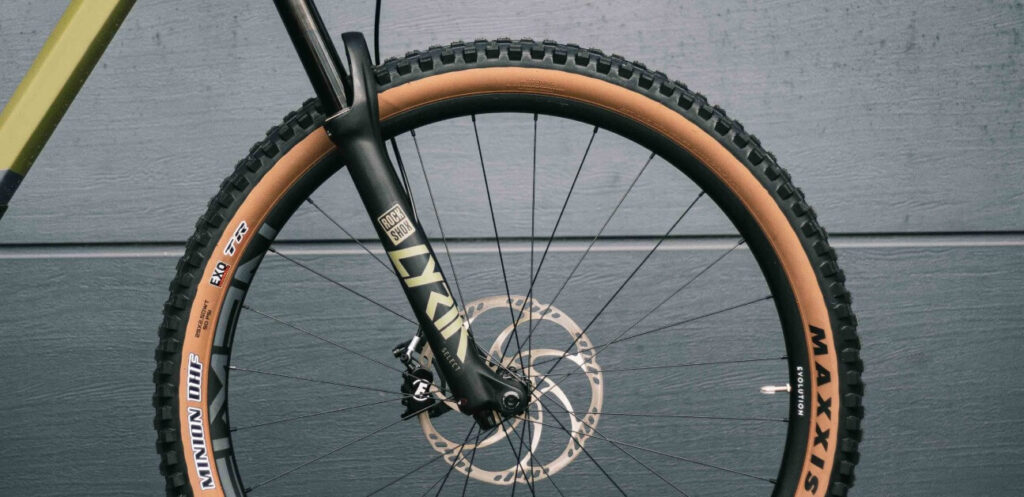
How to Install a Dropper Post on a Cyclocross Bike
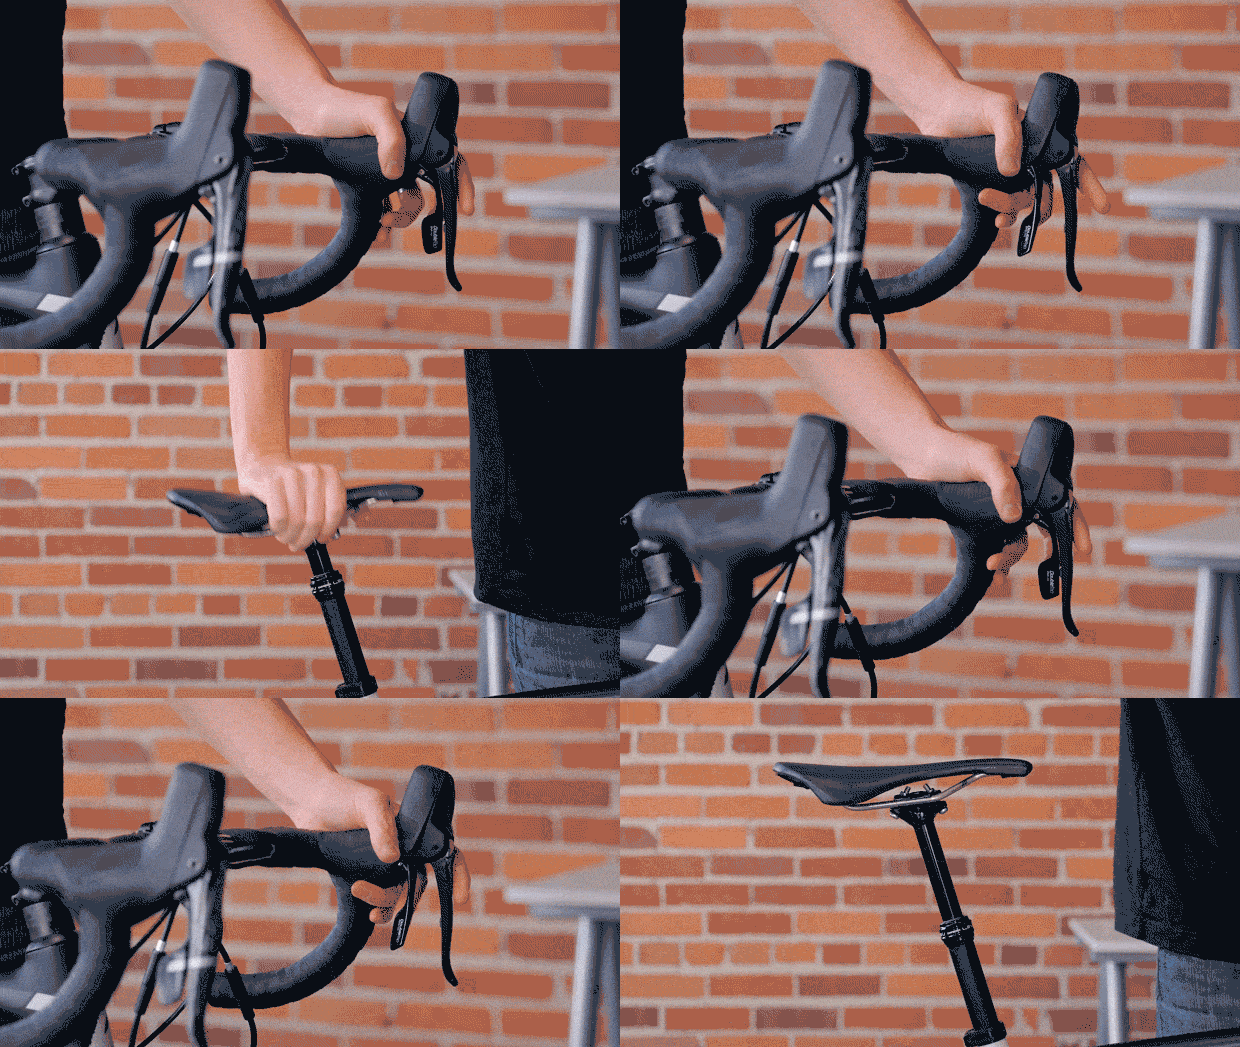
While a dropper post may seem unconventional on a cyclocross bike, there are real advantages out on the course.
Dropping your saddle away from your body allows you to navigate tricky terrain, including barriers, with greater ease. While this increased ability will come with a weight penalty, dropper posts are getting lighter every year and the weight penalty could be justified depending on the terrain you regularly ride.
If you are riding technical terrain that causes your bike to seem like a limiter, or if you’re just curious about how this install works, read on. Learn about cyclocross training in our guide.
Drop Bar Shifter for Remote
Dropper posts come with flat bar remotes, but most cyclocross bikes have drop bars. If your dropper post remote isn’t easily actuated while on your hoods or drops, then it will hardly be beneficial.
Another key component to having a dropper post on a cyclocross bike is a 1x drivetrain (just one chainring up front). Not only will it make this install possible, but it will also go a long way toward simplifying your equipment.
Having no front derailleur means your front shift paddle isn’t connected to anything, freeing it up to act as our dropper post remote. All it takes is a simple modification.
SRAM Shifter
While this will void your shifter’s warranty, the only modification you’ll be making to the shifter is removing the shifter ratchet mechanism. In this case, we’re using a SRAM Force Hydro shifter.
Modification
Step 1: Remove shifter hood
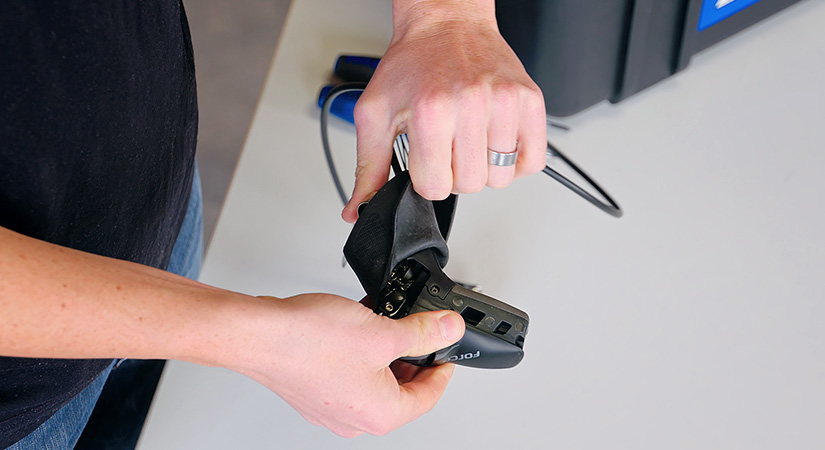
The shifter ratchet mechanism is located behind the rubber hood and a small plate on the outside of the shifter. In order to get to it you’ll first need to remove the hood.
Step 2: Remove plastic cover
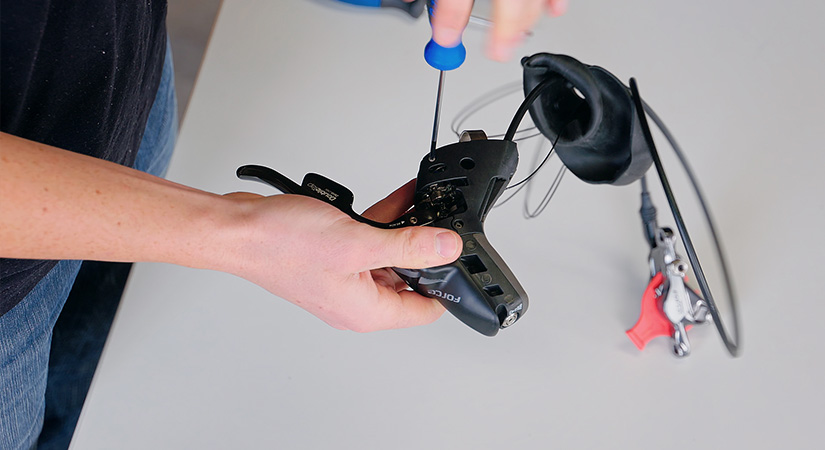
Once you’ve removed the hood, use a small phillips head screwdriver to remove the three screws that secure the plastic cover.
Step 3: Locate shifter ratchet mechanism
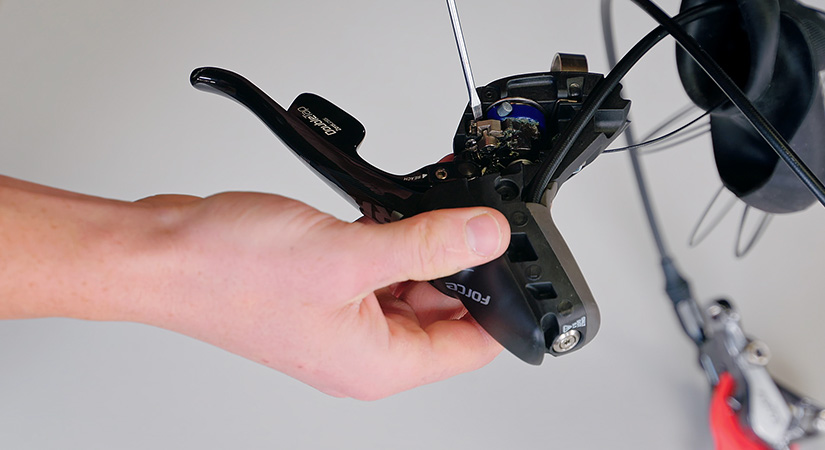
After removing the plastic cover you can locate the shifter ratchet mechanism just below the main mechanism of the shifter.
Step 4: Remove circlip
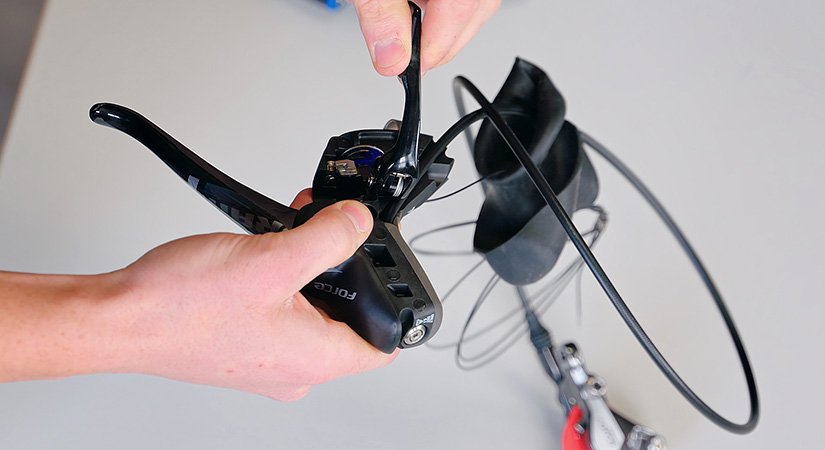
In order to remove the shifter ratchet mechanism you’ll need a flathead screwdriver to remove a circlip and a very small phillips head screwdriver or allen key to push a pin out of the shifter. For easier access to the circlip, I recommend moving the shift paddle inward and holding it up and out of the way.
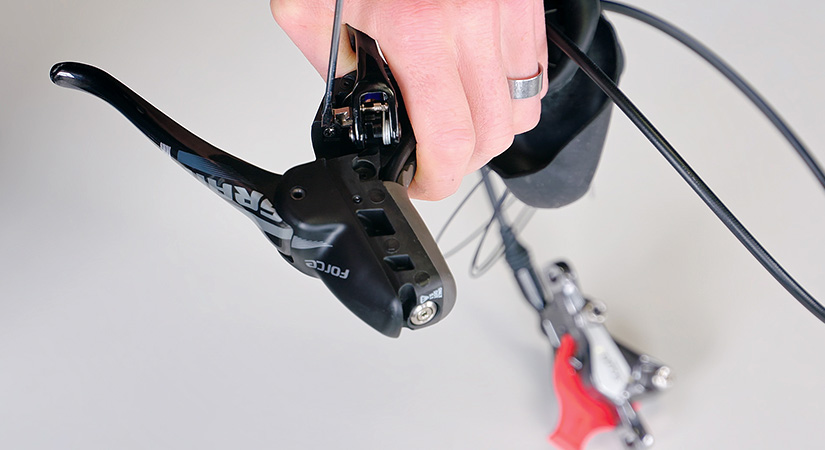
You should now be able to easily see the shifter ratchet mechanism. There’s a pin that runs through the body and the circlip you need to remove is holding that pin in place. To remove the circlip use a small flathead screwdriver and carefully push the open end of the circlip until it pops out.
Step 5: Remove pin
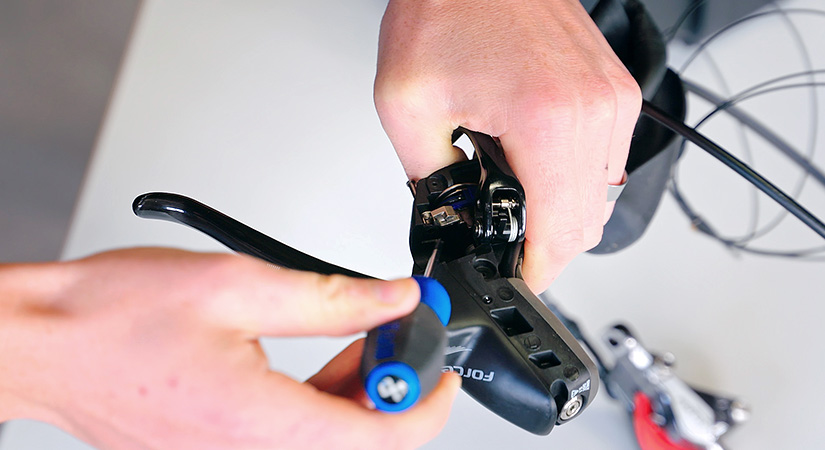
With the circlip out of the way you can push the pin out toward the back of the shifter with a small phillips head screwdriver or allen key.
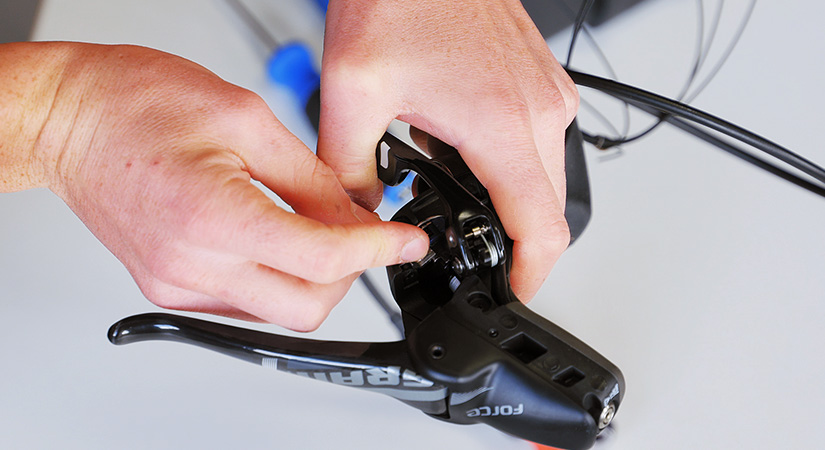
Carefully pull the pin out of the shifter body while keeping a finger over the shifter ratchet mechanism to make sure the spring and other small parts don’t get lost.
Step 6: Remove shifter ratchet mechanism
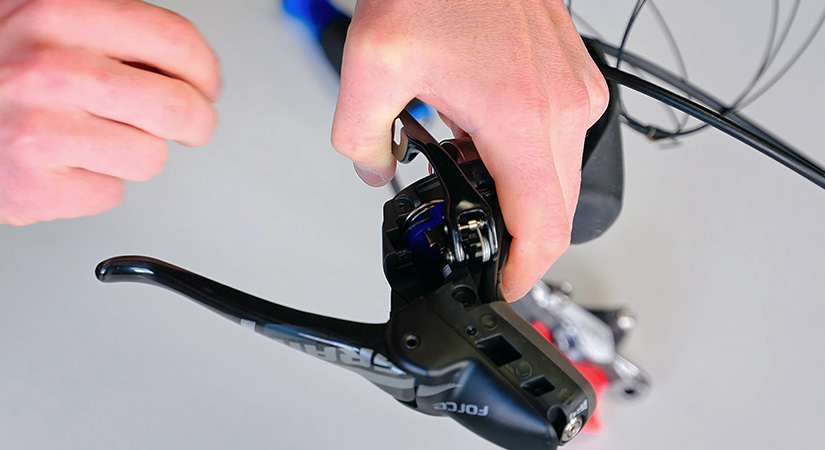
Once you’ve removed the pin, you can carefully remove the shifter ratchet mechanism.
Step 7: Replace plastic cover / rubber hood
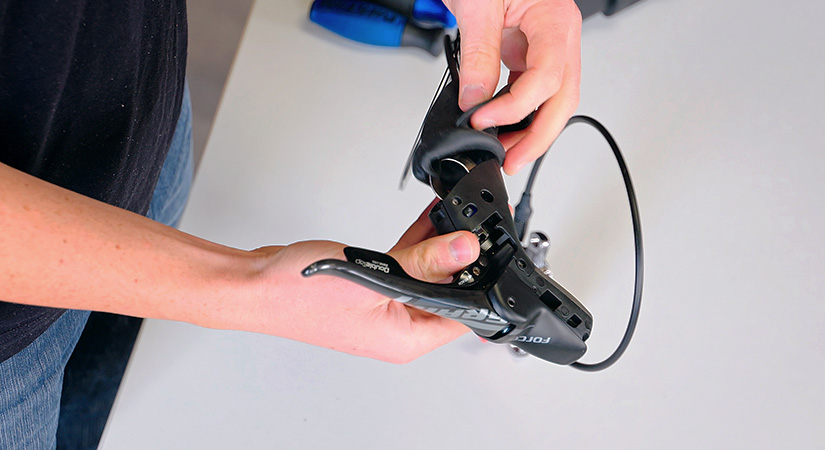
The shifter ratchet mechanism is now removed. Simply replace the plastic cover and rubber hood.
Conclusion
Your shifter is now modified and ready to be connected to your dropper post. While this modification may go against tradition, installing a dropper post is one change you can make to your equipment that can potentially make you faster on race day.
Are you training for your cyclocross season? Get started on a TrainerRoad cyclocross training plan.
